Kitchen decluttering is about making your space work for you, not against you. Focus on what you use daily. Keep things you love and use often.
Pack away or give away what you don’t. Simple steps can make a big difference in how your kitchen feels and functions.
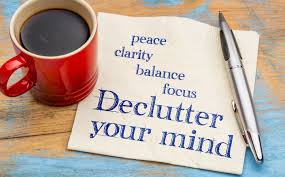
What Is Kitchen Decluttering?
Decluttering your kitchen means getting rid of things you don’t need. It’s about making space. You want to see your counters again.
You want to find things easily. It helps your kitchen feel calm. It makes cooking more fun.
It’s not about having a perfect, empty kitchen. It is about having a kitchen that works for your life. It means sorting through cabinets, drawers, and shelves.
You decide what stays and what goes.
Why does it get so messy? Life happens! We buy new gadgets.
We get gifts we don’t use. Things get pushed to the back of cabinets. We forget what we have.
Sometimes, we just don’t have a good system. Small items add up quickly. Mail, flyers, and school papers land on counters.
These things make a kitchen feel crowded. They also make it hard to cook or prep food.
My Kitchen Chaos Story
I remember one Sunday afternoon. I needed to bake cookies for a school bake sale. I opened the pantry.
It looked like a colorful avalanche was waiting to happen. Bags of flour tipped over. Cans rolled out.
There were three different half-empty bags of sugar. I couldn’t even find the cookie cutters. It felt like a treasure hunt.
A very frustrating treasure hunt. I felt a wave of panic. How could I bake anything in this mess?
I just stood there for a minute. Then I sighed and closed the door. The bake sale felt like too much effort.
That’s when I knew something had to change. My kitchen was not a place for joy. It was a source of stress.
Kitchen Decluttering Goals
Goal 1: Find Everything Fast. No more digging. Every item has a place. This saves time every day.
You won’t buy things you already have.
Goal 2: More Counter Space. Clear counters mean more room. Room to chop. Room to mix.
Room for your coffee maker. It looks so much nicer, too.
Goal 3: Less Stress, More Joy. A tidy kitchen feels good. It makes cooking fun. It is a place you want to be.
It makes guests feel welcome.
Where Kitchen Clutter Hides
It’s funny how things just appear. You think your kitchen is okay. Then you really look.
The junk drawer is a classic example. It’s full of pens that don’t work. Old batteries.
Rubber bands. Odd keys. Things that don’t have a home.
Then there are the cabinets. Things get pushed to the back. You forget you own them.
Old spices. That weird gadget your aunt gave you. Empty boxes.
You end up with duplicates. Or things you’ll never use.
Countertops are another big culprit. They attract everything. Mail.
Keys. Loose change. School papers.
Shopping bags. It’s like a landing strip for random stuff. Even the fridge can get cluttered.
Old leftovers. Mystery containers. Things hidden behind jars.
It all adds up. It makes your kitchen feel small. It makes it hard to work.
It stops you from enjoying your space.
Common Kitchen Clutter Zones
- Junk Drawer: A mix of odds and ends.
- Spice Rack: Old spices past their prime.
- Under the Sink: Cleaning supplies in disarray.
- Upper Cabinets: Rarely used appliances.
- Countertops: Mail, keys, and daily items.
- Fridge Shelves: Expired foods and forgotten items.
The “Keep, Donate, Toss” Method
This is a simple, effective way to start. When you look at an item, ask yourself three questions. Do I use this?
Do I love this? Do I need this? If the answer is no to all of them, it’s time to let it go.
Place it in one of three piles: Keep, Donate, or Toss. For items in good condition that someone else could use, the donate pile is perfect. Broken items or things that are past their useful life go in the toss pile.
Keep only what you use or truly love.
Be honest with yourself. That bread maker you used once? Does it spark joy?
Probably not. That set of mismatched mugs? Are they your favorites?
Maybe just keep one or two. This method helps you make tough decisions. It’s easy to hold onto things “just in case.” But “just in case” often means clutter.
Focus on making your kitchen a functional, happy space. That’s the goal.
Tackling Specific Areas: The Drawers
Drawers are often the first place we dump things. Start with one drawer at a time. Empty it completely.
Yes, all of it. Wipe down the inside. Now, go through each item.
Group similar things together. Utensils go in one pile. Gadgets in another.
Pens and paper in a third. Decide what belongs in that drawer. What doesn’t?
Use drawer organizers. They keep things neat. A divider for utensils is great.
Small containers work for odds and ends.
For the dreaded junk drawer, be ruthless. Keep only essentials. A few good pens.
A notepad. A tape measure. Maybe a small toolkit.
Everything else? It needs a proper home. Or it needs to go.
If you don’t have a drawer for it, maybe you don’t need it. Or find a better spot. A drawer for mail?
Have a dedicated spot for mail. Not in the junk drawer. This step takes patience.
But it makes a huge difference.
Drawer Organization Tips
Empty Completely: Take everything out first.
Group Like Items: Utensils, gadgets, office supplies.
Use Organizers: Dividers and small bins are key.
Be Ruthless: Only keep what you need and use.
One Drawer at a Time: Don’t get overwhelmed.
Cabinets: Making Space You Can Reach
Cabinets often hold items we don’t use daily. Start with one shelf. Take everything off.
Clean the shelf. Now, sort. Are these items you use often?
Or are they for special occasions? Or things you might never use again? Things you use often should be easy to reach.
The front of the shelf. Things you use less often can go higher or further back. Things you almost never use?
Consider donating them.
Appliances are big cabinet offenders. That stand mixer you use twice a year? If it takes up prime real estate, maybe it needs a new home.
Or perhaps a spot on a high shelf. Stacking pots and pans can save space. Use cabinet organizers for lids.
Or stackable shelves for plates. For spices, consider a tiered rack. This way, you can see every spice.
No more digging. Older spices should be checked for freshness. Toss anything old.
Your cooking will taste better.
Cabinet Sorting Strategy
High-Use Items: Front and center, easy to grab.
Occasional Items: Higher shelves, back of cabinets.
Rarely Used: Consider donation or storage elsewhere.
Appliances: Evaluate their space usage.
Stack and Organize: Use shelves and dividers.
Countertops: Your Kitchen’s Command Center
Countertops are prime real estate. They are where most kitchen work happens. Ideally, they should be mostly clear.
This is hard! Mail piles up. Keys get dropped.
The coffee maker lives there. Have a system for these items. A mail sorter.
A key hook near the door. The coffee maker might be an exception. But if you have two small appliances there, could one go?
Or be stored away?
Think about what you need out. Your most-used knife? Maybe.
Your favorite mixing bowl? Probably not if you have cabinet space. Group items that belong together.
If you have a coffee station, keep the coffee, filters, and mugs there. Not spread across the counter. Use trays to corral items.
A small tray for oil and vinegar by the stove. A tray for soap and sponges by the sink. This makes it look intentional.
It stops things from spreading out.
Countertop Clarity Principles
Only Essentials Out: What do you use daily?
Designated Homes: Keys, mail, etc., need spots.
Trays for Grouping: Corral related items.
Vertical Space: Use wall racks or shelves if needed.
Clean Up Daily: A quick wipe-down makes a big difference.
The Fridge and Pantry: Food Management
The fridge can be a black hole. Start by taking everything out. Check expiration dates.
Toss anything old or questionable. Wipe down shelves and drawers. Group similar items.
Milk and juice together. Veggies in one drawer. Fruits in another.
This helps you see what you have. It stops things from getting lost.
Pantry organization is similar. Use clear bins. This lets you see what’s inside.
Label the bins. This makes it easy for everyone to find things. Store like items together.
Baking supplies. Canned goods. Pasta and rice.
Put older items in front. So you use them first. This reduces waste.
It also makes meal planning easier. You know what ingredients you have on hand.
Food Storage Smart Moves
Clear Bins: See contents easily.
Label Everything: For quick identification.
First In, First Out: Rotate stock to reduce waste.
Group by Type: Baking, snacks, dinner items.
Check Dates: Regularly discard expired food.
My Experience with a “Recipe Zone”
I used to have recipe cards everywhere. Some were in a box. Some were loose in a drawer.
Others were tucked into cookbooks. It was a mess. When I wanted to try a new dish, it took forever to find the right card.
I’d spend more time looking for the recipe than actually cooking. So, I created a dedicated “recipe zone.” I bought a binder. I used dividers for different types of recipes: dinners, desserts, breakfasts.
Now, all my go-to recipes are in one place. I laminated the most used ones. This protects them from spills.
I also added a section for new recipes I want to try. It’s amazing how much easier cooking is. I can grab the binder.
Flip to what I need. No more digging through piles. It made a small corner of my kitchen so much more functional.
And I actually use more recipes now. It’s a simple win.
Recipe Zone Setup
Binder Choice: A three-ring binder works well.
Dividers: Separate by meal type or cuisine.
Laminating: Protects frequently used cards.
“To Try” Section: Keep new ideas organized.
Location: Store it in an accessible cabinet or shelf.
Dealing with Kitchen Gadgets and Small Appliances
This is a big one for many people. We accumulate so many gadgets! Spiralizers, avocado slicers, fancy choppers.
Do you use them? Be honest. If a gadget has a specific purpose, and you use it often for that purpose, keep it.
If it’s a novelty item you used once, it’s probably time to let it go. Think about duplicates. Do you need three whisks?
Probably not.
For the appliances you do keep, assign them a home. The stand mixer might live in a large cabinet. The toaster belongs on the counter if you use it daily.
Or in a cabinet if you use it less. Consider vertical storage. A shelf above your counter for smaller items.
Or a rolling cart that can be tucked away. If you have a very small kitchen, this becomes even more important. Prioritize what you truly need and use.
Gadget & Appliance Audit
Frequency of Use: How often do you really use it?
Purpose: Does it do a job nothing else can?
Duplicates: Keep only the best one.
Storage Space: Does it have a reasonable home?
Donation Bin: Items used once or never.
Paper Clutter: Mail, Notes, and Recipes
Paper is a constant battle in many homes. Mail comes in every day. Notes from school.
Flyers. Shopping lists. These things land on the kitchen counter.
Create a system. A mail sorter near the entrance. Have a designated spot for incoming mail.
Sort it as soon as possible. Recycle junk mail immediately. File important documents.
Have a place for notes and school papers.
For recipes, I already shared my binder idea. But if you have loose recipe cards or printouts, a small box or folder can work. Or a dedicated drawer.
The key is to have ONE place for them. Not scattered across the kitchen. Keep your kitchen workspace clear.
This means dealing with paper as it arrives. Don’t let it pile up. It makes the whole kitchen feel messy.
Paper Management Flow
Incoming Mail: A designated sorter or tray.
Immediate Sort: Recycle junk, file important.
Notes & School Papers: A bulletin board or folder.
Recipes: One organized system (binder, box).
Daily Sweep: Clear counters of new paper each evening.
Maintaining a Decluttered Kitchen Long-Term
Decluttering isn’t a one-time event. It’s an ongoing process. The best way to keep your kitchen tidy is to put things away.
After you use them. After you cook. After you eat.
Make it a habit. A quick 10-minute tidy-up each evening can make a huge difference. Wipe down counters.
Put dishes in the dishwasher. Return items to their homes.
When you buy something new, think about where it will live. Does it have a home? If not, do you really need it?
Or do you need to make space? Regularly revisit your cabinets and drawers. Do a mini-declutter every few months.
This catches clutter before it becomes overwhelming. It’s much easier to deal with a few items than a whole drawer full of things you don’t need. Consistency is key.
Daily & Weekly Habits
Daily Tidy: 10 minutes before bed.
Put Away Promptly: Don’t leave things out.
One In, One Out: When buying, consider decluttering something else.
Monthly Check: Quick scan for new clutter build-up.
Seasonal Deep Dive: A more thorough sort twice a year.
When Is It Too Much Clutter?
It’s easy to let things slide. But when does kitchen clutter become a problem? When it impacts your ability to cook.
If you can’t find ingredients. If you don’t have space to prep food. When it causes stress.
If you feel anxious or overwhelmed every time you enter the kitchen. That’s a sign. Also, consider hygiene.
Clutter can hide spills and food particles. This can attract pests.
If you feel embarrassed to have people in your kitchen. That’s another signal. Your kitchen should be a welcoming space.
Not a source of shame. If you’re spending more time looking for things than using them. It’s time for a change.
Don’t wait until it feels impossible. Small, consistent efforts are much easier than a massive overhaul later.
Making the Most of Small Kitchens
If you have a small kitchen, every inch counts. This is where decluttering is even more critical. Maximize vertical space.
Use wall-mounted shelves for spices or dishes. Hang pots and pans. Consider a slim rolling cart that fits between appliances.
Clear off as much counter space as possible. Store appliances you use often on shelves, not counters. Think creatively about storage.
Multi-functional items are your friend. A cutting board that fits over the sink. A nesting set of bowls.
A compact dish drying rack. In a small kitchen, you really need to be strict about what comes in. And what stays.
If it doesn’t serve a purpose or you don’t love it, it’s probably taking up valuable space. Keep it simple. Keep it functional.
And keep it clean.
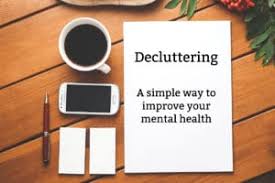
The Emotional Side of Decluttering
Letting go of kitchen items can be hard. We often attach memories to things. That chipped mug from your first date.
The cookbook your grandmother used. It’s okay to keep a few sentimental items. But don’t let them take over.
Choose one or two special pieces. Display them if you can. Or store them safely.
The goal is to have a functional kitchen. Not a museum.
Sometimes, clutter is a sign of stress in other areas of life. If decluttering feels overwhelming, start small. Five minutes at a time.
Focus on one drawer. Celebrate small wins. As you clear space, you’ll likely feel a sense of relief.
This can motivate you to keep going. Be kind to yourself. This is a process.
What to Do with Items You’re Letting Go
Donating items in good condition is a great way to help others. Local shelters, churches, or community centers often accept kitchenware. Thrift stores are also a good option.
If items are broken or unusable, make sure to dispose of them properly. Check your local recycling guidelines for electronics or metal items. Some items might be hazardous waste.
Research your local options.
Selling items can also be an option for gently used, higher-value items. Online marketplaces or consignment shops can work. But don’t let the idea of selling them stop you from decluttering.
If it’s causing stress, donate it. The goal is to free up your space and your mind. Donating makes you feel good, too.
FAQ: Your Kitchen Decluttering Questions Answered
How often should I declutter my kitchen?
Aim for a quick tidy daily and a more thorough declutter session every 3-6 months. Small, regular efforts prevent big messes.
What if I have too many kitchen gadgets?
Be honest about usage. If you haven’t used it in a year, or it has a single, limited purpose you rarely need, consider donating it.
How do I organize my spices so I can see them?
Use a tiered spice rack or clear bins. Keep them in a cabinet or on a shelf where you can easily read the labels.
My junk drawer is a disaster. Where do I start?
Empty it completely. Group items, then decide what truly belongs there. Use small organizers for pens, batteries, and other odds and ends.
I have too many mugs. What should I do?
Keep your absolute favorites. If you have more than you need for your household plus a couple of guests, it might be time to donate the extras.
How can I keep my countertops clear?
Have designated spots for mail, keys, and charging devices. Only keep essentials like your coffee maker or toaster out if used daily.
What about sentimental kitchen items?
Keep a select few that are truly special. Display them if possible, or store them safely. Don’t let sentimentality create clutter.
Final Thoughts on a Tidy Kitchen
Your kitchen is the heart of your home. Making it a calm, organized space is worth the effort. Start small.
Be consistent. Celebrate your progress. A decluttered kitchen isn’t just about looks.
It’s about making your life easier. It’s about enjoying the process of cooking. And it’s about creating a space you love.
You’ve got this!